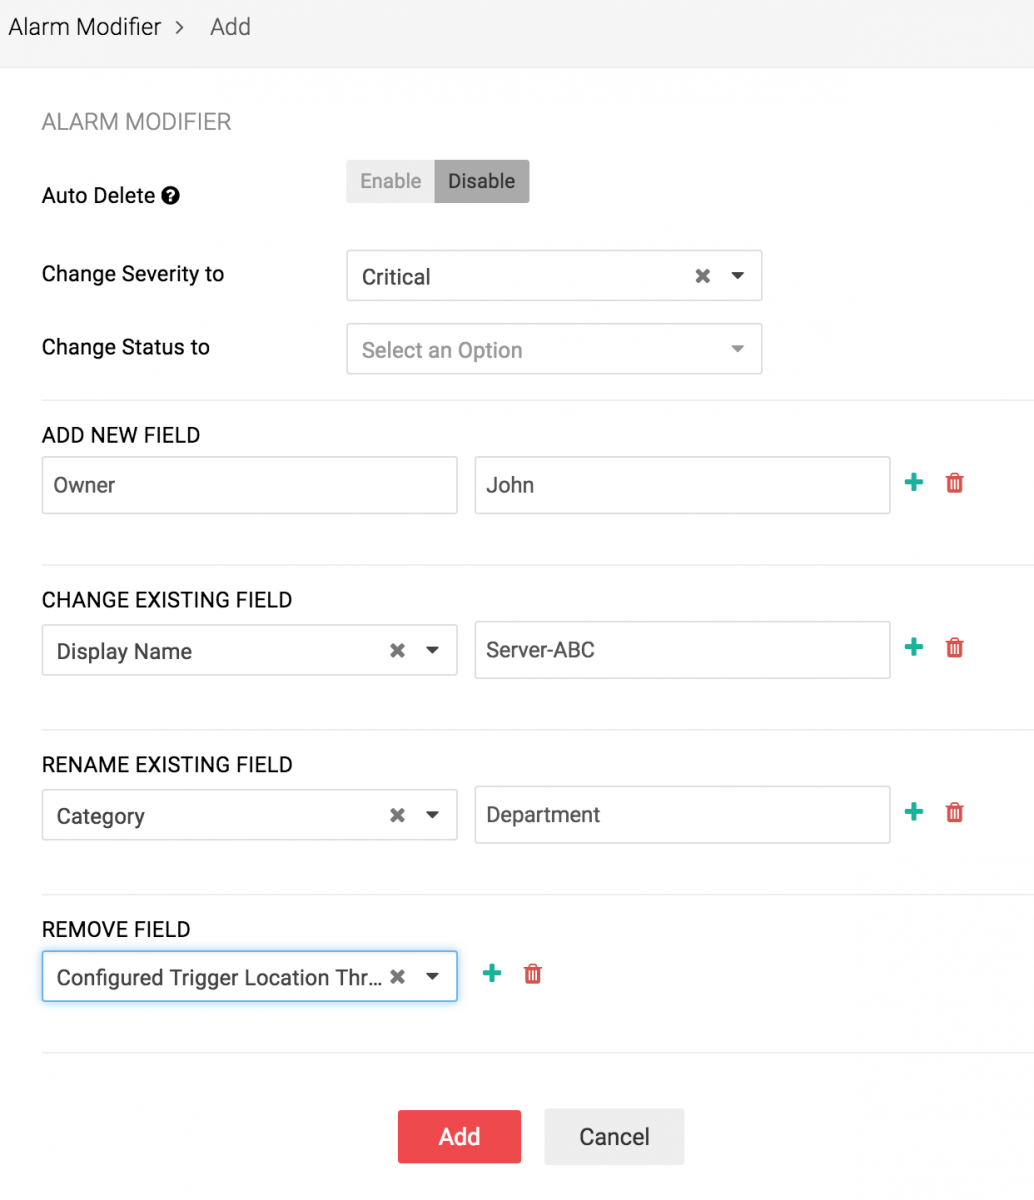
Alarm Modifier:
Alarm Modifier is a tool that helps you modify the status and severity of alerts automatically. You'll have to define the criteria in a configuration profile so that the required modifications are made when the alerts satisfy the conditions in that configuration profile.
Auto severity-change:
You can automatically change the severity of incoming alerts in AlarmsOne to Critical, Major, Warning, or Info. This helps you prioritize alarms based on the alarm content rather than the irrelevant severity set by few apps.
Below are the steps to configure an Alarm Modifier to automatically change the severity of an alert.
1. Give the Alarm Modifier a name.
2. Select a config profile or add a new one and define the conditions to be satisfied.
3. In 'Severity' drop-down box, choose Critical/Major/Warning/Info as per your requirements and click Add.

Auto status-change:
You can automatically change the status of incoming alerts in AlarmsOne to acknowledged or closed. This helps you reduce alert noise by automatically responding to alerts that don't need your interruption.
Below are the steps to configure an Alarm Modifier to automatically change the status of an alert.
1. Give the Alarm Modifier a name.
2. Select a config profile or add a new one and define the conditions to be satisfied.
3. In 'Status' drop-down box, choose Acknowledge/Close as per your requirements and click Add.

Auto delete:
Using Alarm Modifier, you can automatically delete unimportant alarms. This helps you reduce alert noise by automatically deleting alerts that don't need your interruption.
Below are the steps to configure an Alarm Modifier to automatically delete an alert.
1. Give the Alarm Modifier a name.
2. Select a config profile or add a new one and define the conditions to be satisfied.
3. Click Enable in Auto-delete and click Add.

Modifying the Field name and Field values:
Add new field:
You can add new field to an alarm. Goto Settings -> Alarm Modifier -> Add. Here, define the criteria and then in the 'Add new field' column, enter the field name and field value you want to add when the alarm satisfies the defined criteria.

Change existing field:
To change the existing field value, select the field name and then enter the new field value you want against that field name.
Rename existing field:
You can also rename an existing field name if the field name in the alarm is not relevant to you. Select the field and enter the new name you want to give to that field.
Remove field:
If you find any field unnecessary, you can remove it from the alarm. To do so, just select the field under the 'Remove field' box.
